
Objective trees are helpful tools to use when finding a solution to a problem. They are most effectively used alongside a core problem tree, as a way to analyze solutions. This tree provides a structure to identify the challenges, requirements and potential consequences of a given solution. Developing an objective tree makes it easier to create solutions that address root causes rather than the symptoms of an issue. Therefore, creating an objective tree is a useful step in problem solving, as it provides the structure for understanding the issue at hand in depth and developing tailored solutions.
Since objective trees are most commonly and most effectively used as an analysis tool for a preexisting core problem tree, this article works off of the assumption that you’ve already made a core problem tree to work with. We work off of the example tree we used in our core problem tree article. It may be helpful to duplicate your core problem tree document, and simply edit entities as you re-frame the problem. Keep reading to see how it works!
Transcript continues after video.
Flying Logic Setup
Settings for an objective tree follow the same set up as a core problem tree. So, if you’re working in a duplicated core problem tree document the settings will be ready to go.
If you’re working in a new document, some settings will need to be changed in order to match the example tree we make here.
We’ve set the orientation of our tree to Bottom to Top, with the bias set to Top. Trees can be made in any linear orientation option, so feel free to change this if you’d like. However, we recommend setting the bias to the “top” of the tree, or the area that is the furthest away from the roots of the tree.

Objective trees are built the same way core problem trees are, with cause edges leading up to the core entity, which has edges that lead up the the effect entities. Keep this in mind when choosing an orientation.
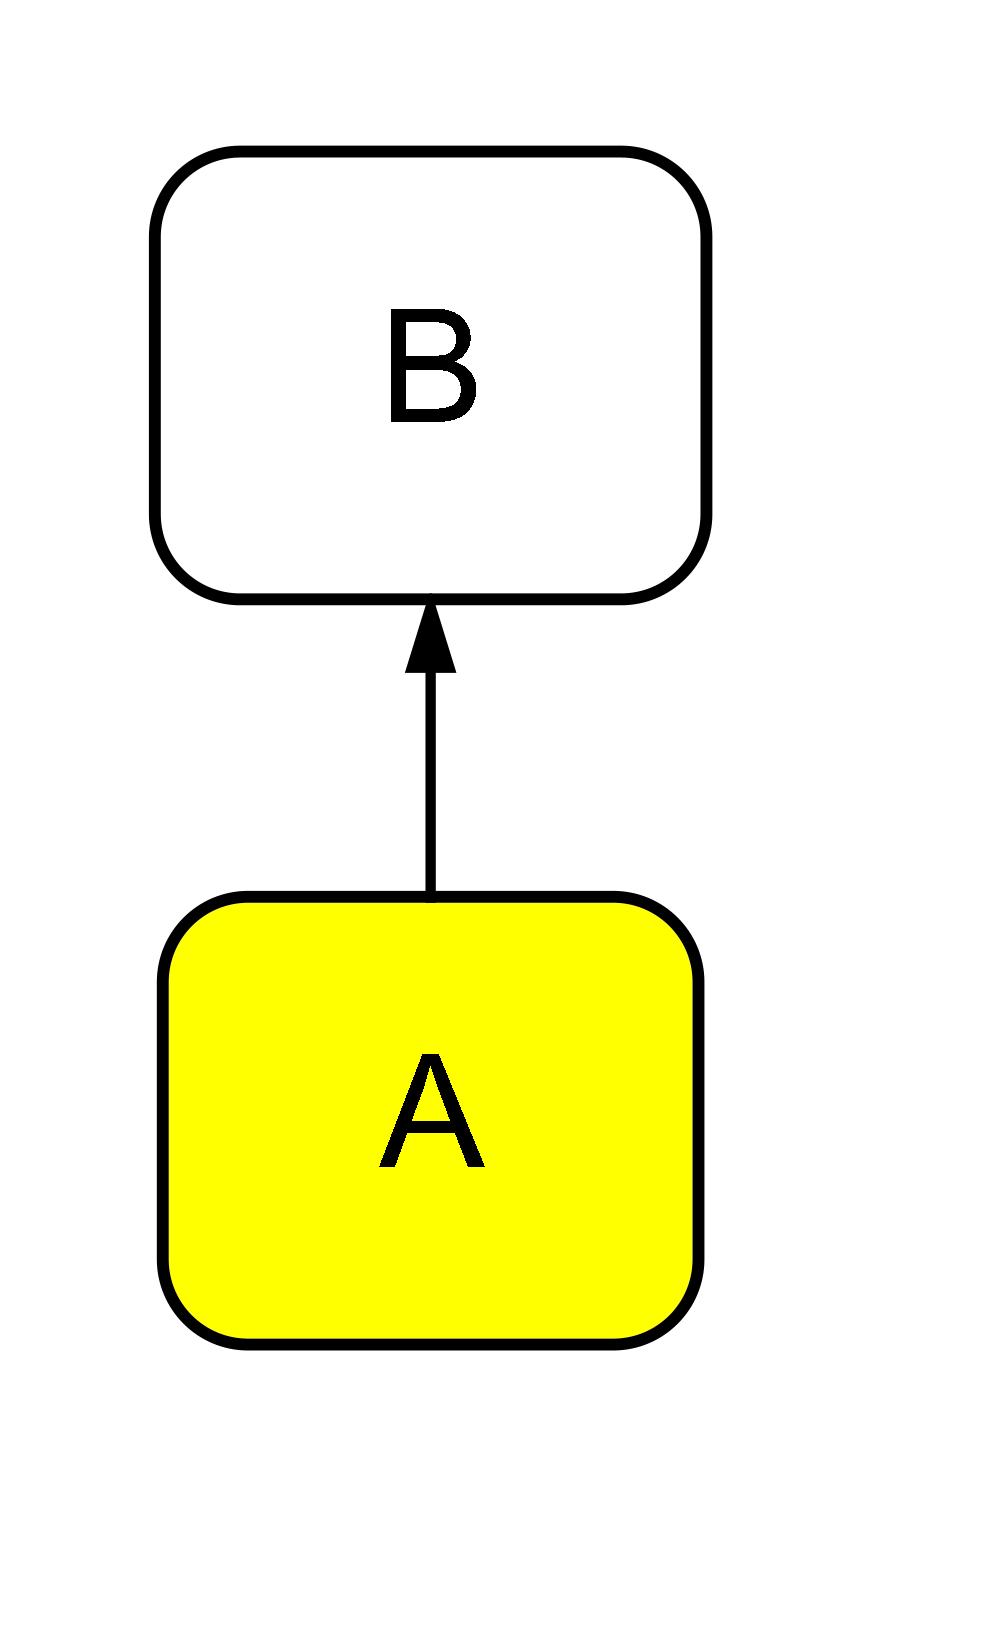
This way of formatting the tree allows for the edges to be read in a fluid sentence. For example, the edge between the entities A and B can be read as “A is why B happens or exists,” or a simpler, “A causes B.”
We’ve created an example domain that is different from our core problem tree domain for clarity. This is completely optional to use, and if you’re using a preexisting core problem tree as a template it will be easier to continue with that tree’s domain.
Our example domain consists of three entities: a means entity, an objective entity and an effects entity.

You can download the domain in this post on our forum. The first file is a blank Flying Logic document that has the domain already in its domain menu. The second file is another Flying Logic document with the domain included, however it also includes the tree we make here. The final link is a PDF of our example tree.
If you’re building a tree from scratch, feel free to either edit the example domain, make your own domain, or use the general domain in the default domain menu.
Step 1: Determine the Objective
The objective is the equivalent of the core problem in a core problem tree. It sits between the means and effects, and encompasses the solution you are laying out in the tree. Our core problem tree had the core problem, “River water quality is deteriorating.”
To create the objective for our tree, we re-framed the problem of the core problem tree as its solution, or the situation we would like the current problem to be in the future. For example, instead of deteriorating, we want river water quality to improve. Therefore, we get the objective: River water quality improves.

If you’re building a tree from scratch, you will need to establish an issue to work with before starting your tree. Objective trees will only ever have one objective, so if you have multiple issues you would like to address you will need to make multiple trees. Once you have an established issue, use the same re-framing process described above to create your objective.
You can add the objective entity, and begin your tree, by dragging an objective entity onto the canvas. Then label it with a clear description of what your objective is. Right now it will be on its own, so our tree looks like this:

Step 2: Determine Means
Means are things that are required in order for the objective to happen. They are solutions to smaller, more specific problems that create a domino-effect that leads to the objective.
The means of an objective tree are the same entities as the causes of a core problem tree. If you’re working off of a preexisting core problem tree as a template, you can simply change the content of the cause entities with the means you create.
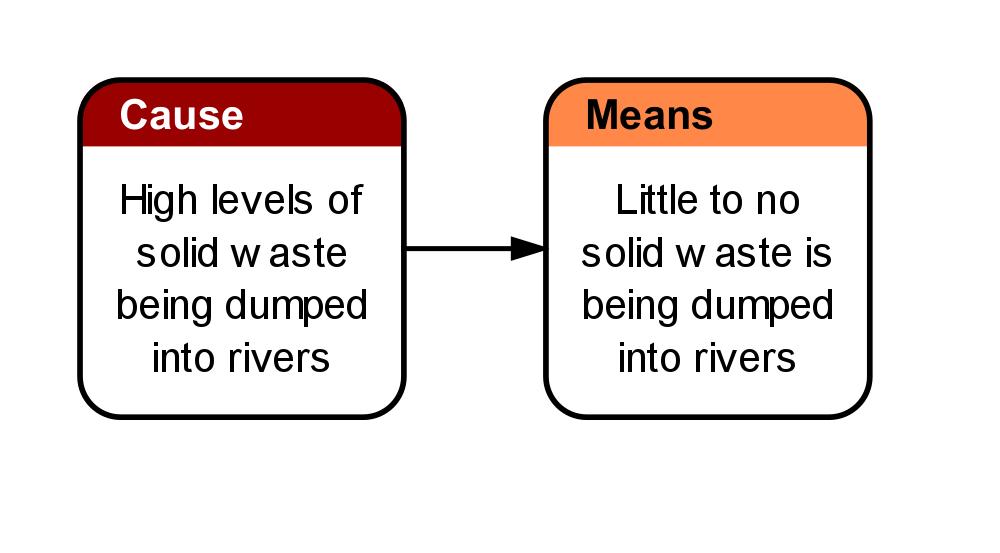
Determining means follows the same process as determining the objective. You can take a cause from your problem and re-write it as its fixed situation, and you’ve got a means! For example, in our core problem tree, one of the first causes that was added was that high levels of solid waste is being dumped into rivers. To re-write this as a means for our tree, we would change it to the solution that would fix the issue. Instead of high levels of waste, little to no solid waste would be dumped into rivers.
If you aren’t working from a core problem tree, you’ll need to create new entities altogether. You can ask yourself and other stakeholders, “What is needed for the objective to happen?” Researching the objective and what issues are currently preventing it from being the status quo can be helpful in finding means.
Means are added as predecessors to the objective, so in our example the means go under the objective entity with edges leading up to it. To add entities to the canvas you can drag means entities into the drop zone of the objective entity, at the bottom edge. You can also drag means entities onto the canvas, and connect them to the objective entity manually.

The first layers of means preceding the objective can be referred to as immediate means. An objective will usually have more than one layer of means, as means can have means of their own. The second layer of means is referred to as secondary means.
Again, if you are working from a core problem tree, these entities will already exist, and simply need to be re-written in the same way you did the immediate means. If you’re building a tree from scratch, you’ll want to repeat the process of asking what’s needed for something to happen, this time focusing on a means entity instead of the objective.
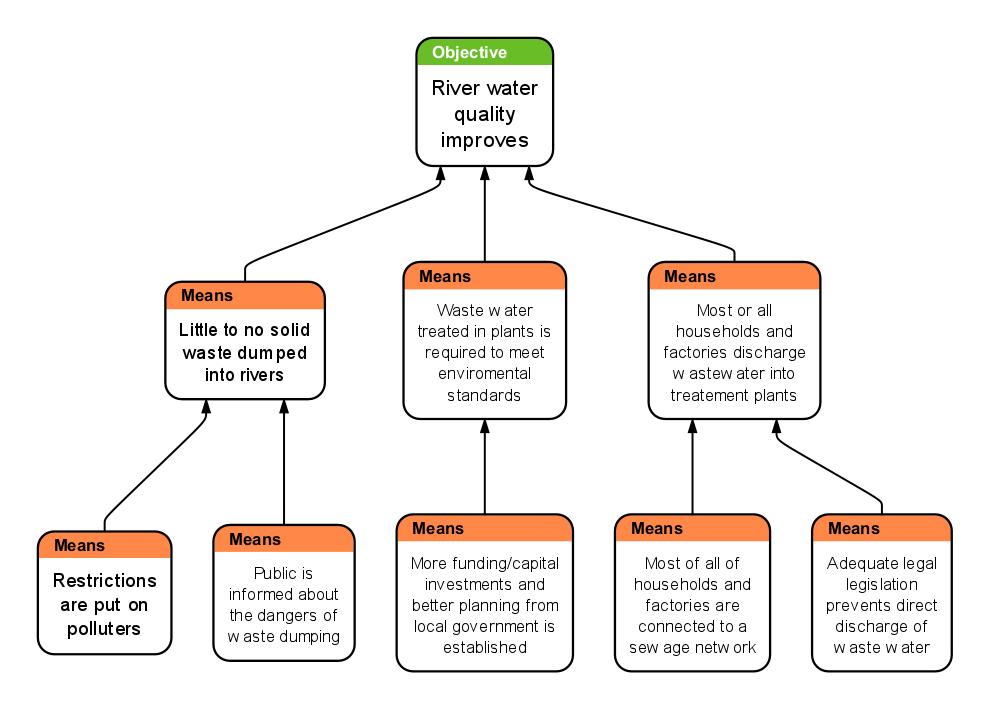
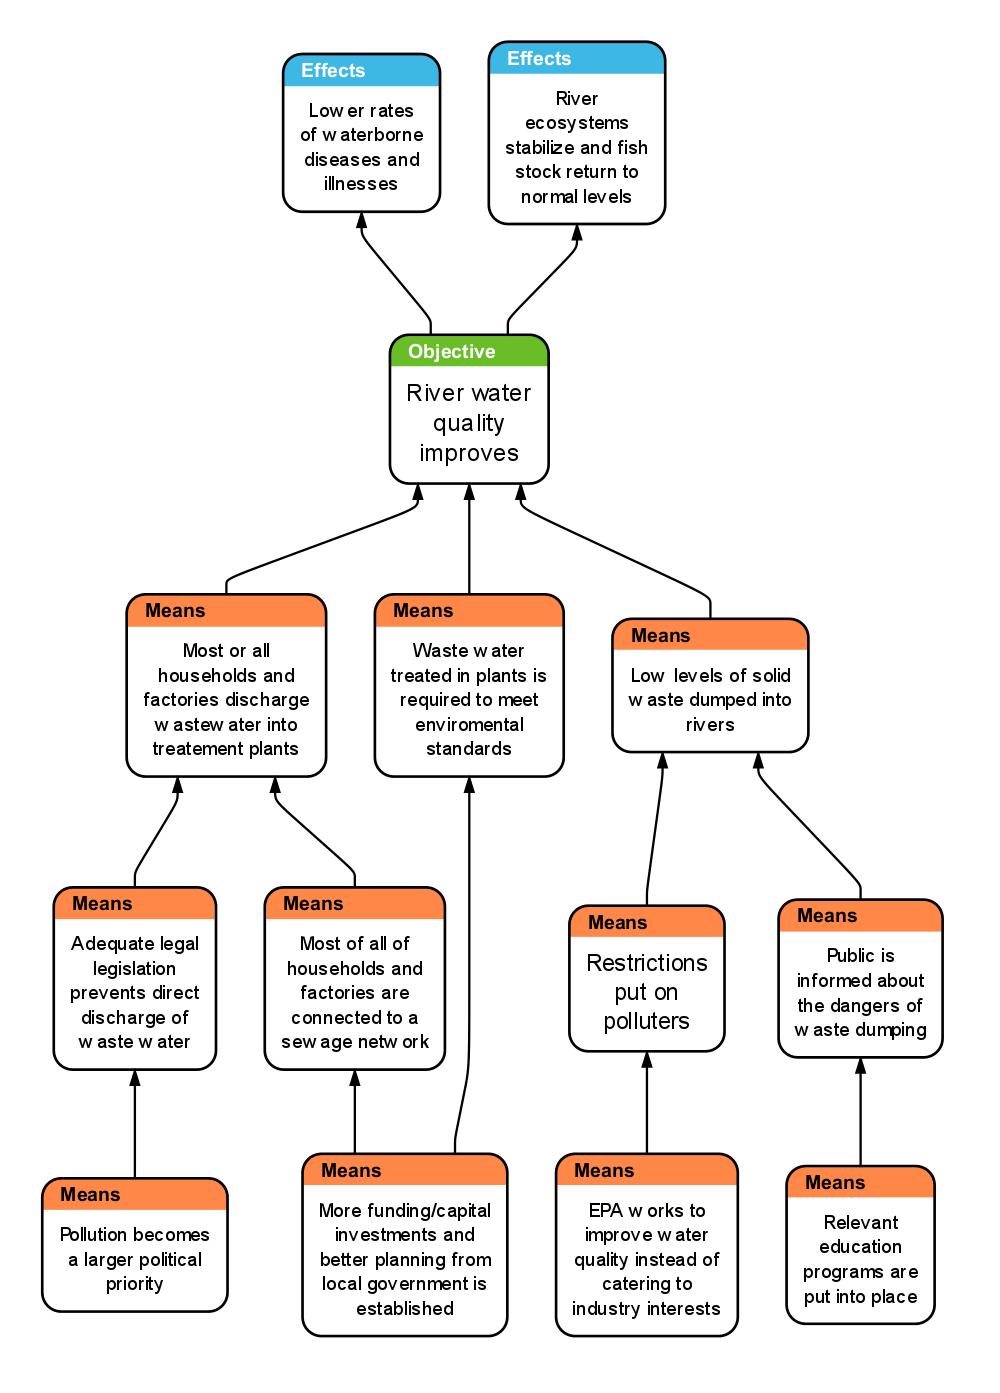
Our tree has three layers of means, however yours may have more. After all of the means are added, our tree looks like this:

Step 3: Determine Effects
The effects of an objective tree will be the same entities as the effects of a core problem tree. However, in the objective tree we also re-write the effects in a positive light.
If you’re working from a template you can re-frame the effects that are already in your tree as what they’ll become when the objective happens. For example, one of the effects of our problem in our core problem tree was a high incidence of waterborne diseases and illnesses. If our objective comes to pass, and water quality improves, there will be less incidences of waterborne diseases or illnesses.

If you’re not working with a preexisting core problem tree, you’ll need to determine effects from scratch. A good question to use to think about potential effects is, “What would happen if the objective happened?”
Effect entities are added as successors to the objective, because the objective causes them to happen. You can add effects entities to your tree by either dragging an effects entity to the applicable drop zone on the objective entity, or drag them onto the canvas and connect an edge from the objective to the effects entity manually.
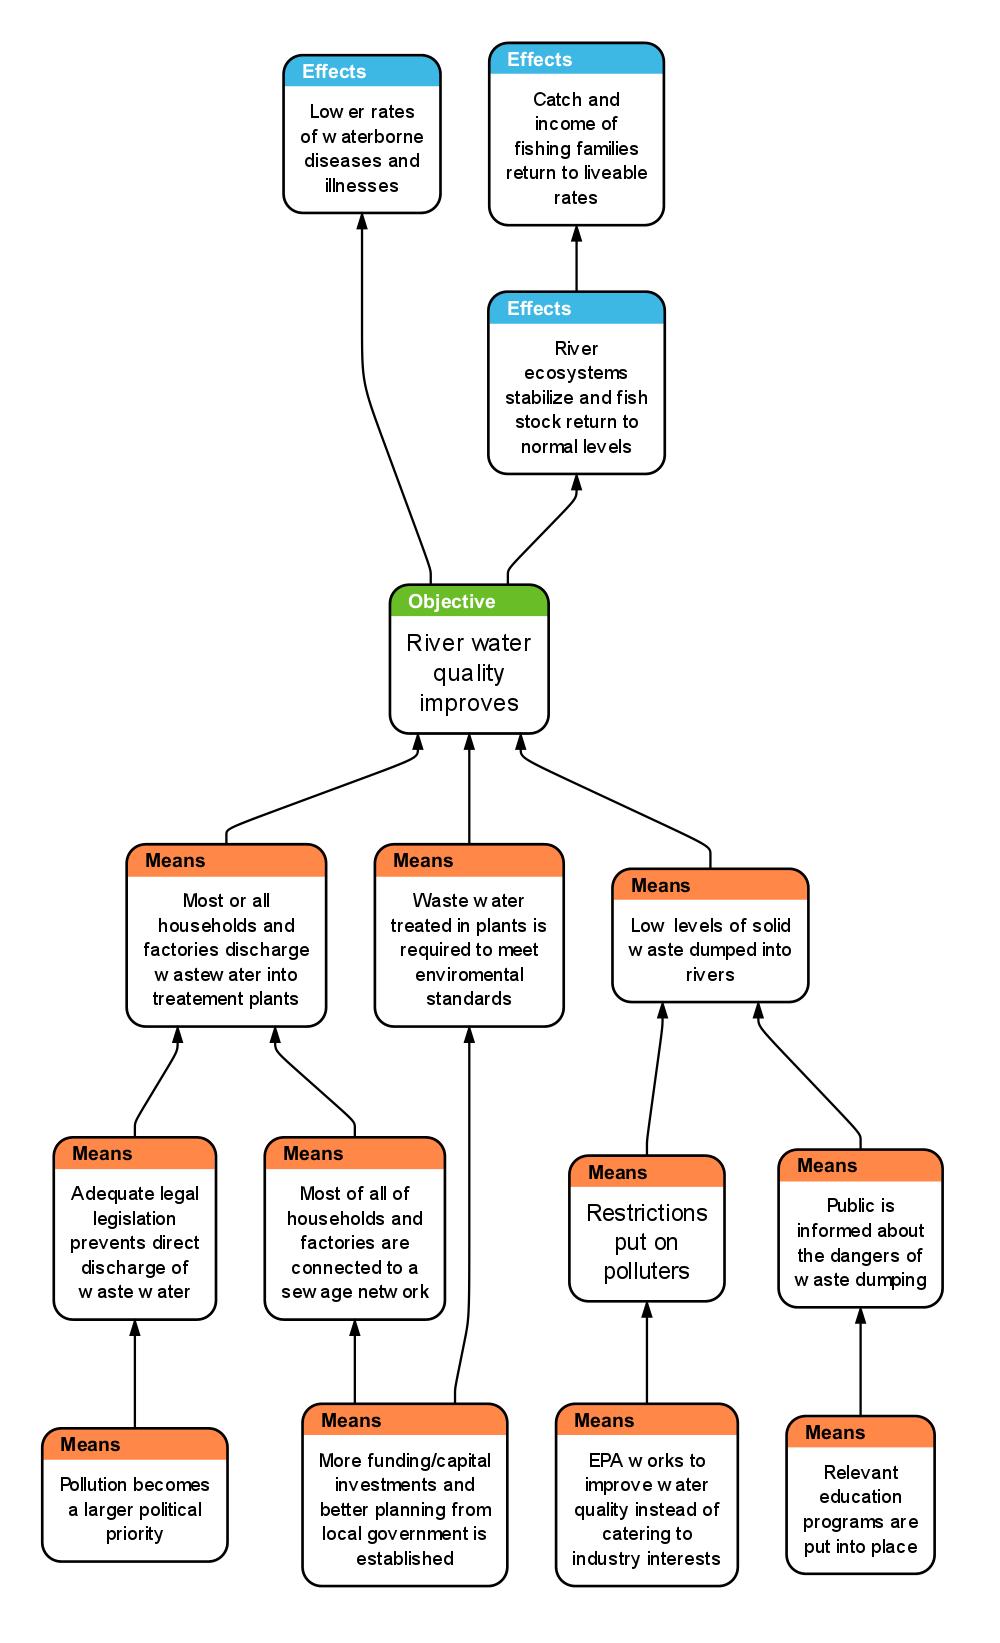
Effects have immediate and secondary effects the same way means do. If you’re working from a core problem tree, continue re-writing the already existing entities. If you’re building a tree from scratch, you can ask the question, “What would happen if this immediate effect happened?” Secondary effects are added as successors to immediate effects. Once all of the effects in our example are added, our finished tree looks like this:
Step 4: Create a Plan of Action
A finished objective tree will have many solutions already listed that you can carry out to work towards the objective. However, it can be helpful to consciously create a plan of action in order to achieve the entity.
To devise a plan of action, focus mainly on the means of the objective tree. These are smaller, more specific goals to achieve, and working towards them simultaneously works towards the objective. A plan of action could be starting on the bottom most layer of means, and working upwards. Achieving the smallest means alone may create a domino effect that achieves the objective. Your plan of action will ultimately depend on what you’re looking to achieve, how many resources you’re able to put towards achieving it, and the amount of influence you have for your means. In our example, a given company or organization may not have the influence to make river quality a larger political priority, so that’s an unreasonable path to take.
Regardless, your tree is now finished, and you have a reference to potential solutions to work towards in order to meet your end goal.
What’s Next?
Wanting to do more with Flying Logic? Check out these articles next…
How to Create a Requirements Tree with Flying Logic