
A core problem tree is a tool that identifies, organizes and prioritizes key issues related to a particular problem or challenge. It’s used both for short-term and long-term goals, and allows stakeholders to understand the root cause of an issue and then develop an effective solution. Additionally, it can help provide valuable insight into how a project may affect different people, leading to more informed decisions. Continue reading to learn how to make your own!
Transcript continues after video.
Flying Logic Setup
We’ve set the orientation for our example to Bottom to Top, with our bias set to Top. Trees can be formatted in any linear orientation, but we find that core problem trees are easily read in our example orientation. If you decide to use an alternative orientation, we suggest you set your bias to the “top” of the tree, the area that’s furthest away from the roots of the tree.

For this tree we’ve created a domain that is suitable for any core problem tree. It contains three entity types: a problem entity, a cause entity and an effect entity. These are the three essential elements of a core problem tree, and are all that’s needed to get started.

Access our domain in this post on the Flying Logic forum. The first file is a blank document that has our example domain ready to use in the domain menu. The second file is an editable document that contains the domain and the example tree we make in this article, and the third file is a PDF of our example tree.
Of course, you can always create a domain more specific to your needs, or even edit the one we’ve created. If you’d prefer to use a built in domain, the General domain will work fine.
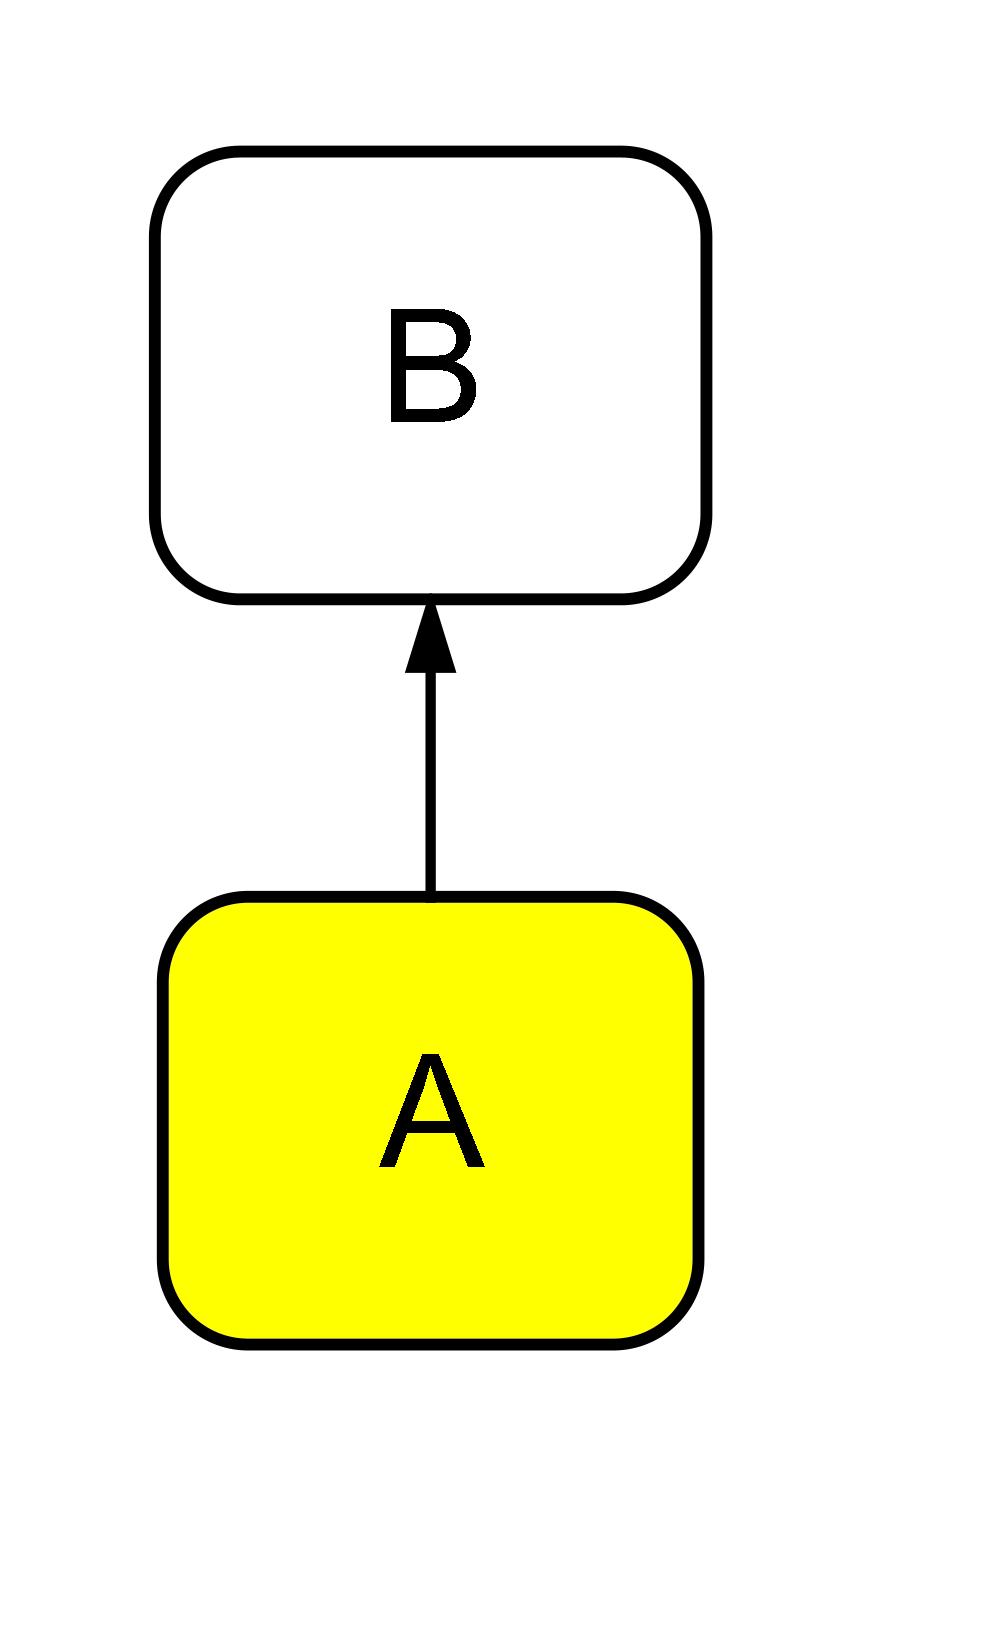
In a core problem tree, the causes of the problem have edges that lead up to the problem, which then has its own edges that lead to the effects of said problem. This format allows the edges of the tree to be read as a fluid sentence. For example, given that entity A below is a cause of entity B, the edge can be read as “A is why B happens or exists,” or a simpler, “A causes B.”
Step 1: Establish the Problem
To start a core problem tree, you first need to have a problem to solve. You may already have a problem in mind, or you might need to brainstorm problems with other stakeholders. (Brainstorming will leave you with multiple problems to tackle.) Core problem trees will only ever have one problem, so if you have multiple issues you want to address, you’ll need to either consolidate them into one broader issue, or create multiple trees.
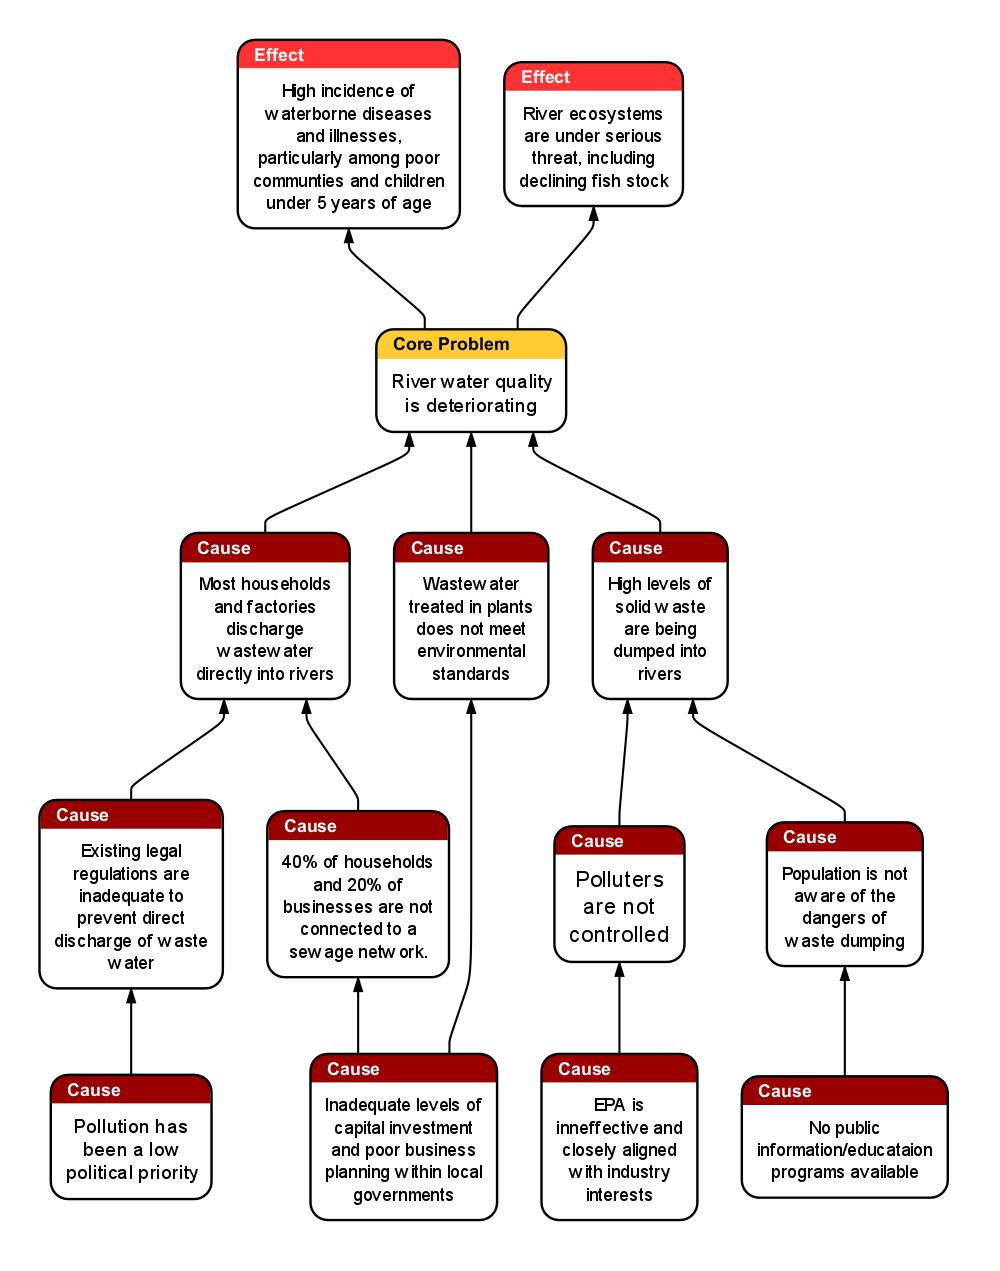
Once you’ve identified the problem, you can create an entity for it. Drag and drop a “Core Problem” entity (or whichever entity you are using to label the issue you’re addressing) from the domain inspector onto the canvas. This entity will end up in the middle of the tree by the end of this process (hence the title “core” problem tree), but for now it’s on its own, leaving us with this:

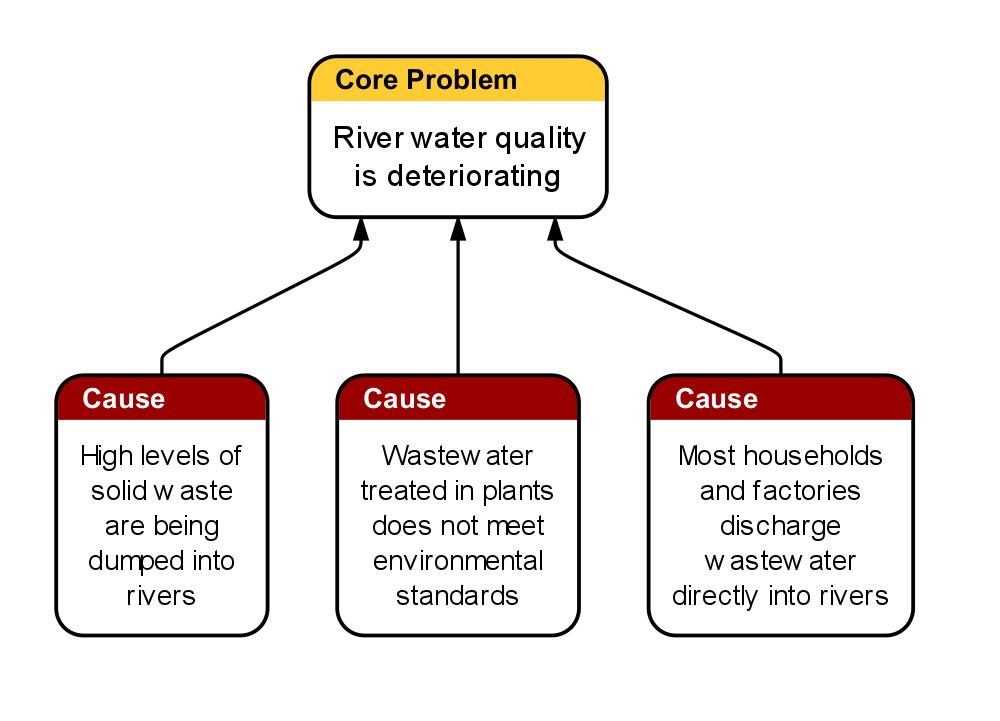
Step 2: Add Causes
The next step is to add the causes of the established problem. Brainstorming with a team is an effective way of figuring out causes. A very detailed view of the problem will require research, but will elevate your tree overall. It may be helpful to ask yourself, “Why does the problem happen,” or another similar question.
For example, in our tree you could ask “What’s causing the deterioration of river water quality?” One answer to this, and a cause to our problem, is that solid waste is being dumped into rivers.
Causes are added below the problem, with edges that lead up to the problem. If you’re working with an alternative orientation, the causes will be placed preceding the problem. To list causes, you can either drag a Cause domain to the applicable drop zone of the core problem entity (located at the bottom edge), or drop it onto the canvas and connect an edge from it to the core problem entity manually.
After you’ve created the first layer of causes, also called immediate causes, you can move to working on their causes. Immediate causes break into secondary causes. You can use the question, “Why is this immediate cause happening?” for these as well.
Continuing with the example from above, we could ask, “Why is solid waste being dumped into rivers?” One answer to this is that polluters are not being controlled. There’s another secondary cause as well, which is that the general public is not aware of the danger of dumping waste into rivers. This means two cause entities, one for each secondary cause, branch from the immediate cause of solid waste being dumped into rivers.
Add secondary causes under their respective immediate causes. You can add them to the tree the same way you added immediate causes above.

Repeat this process as many times as is necessary, and stop when there are no more causes to list. We continue with one more layer on our tree, yours may require more.
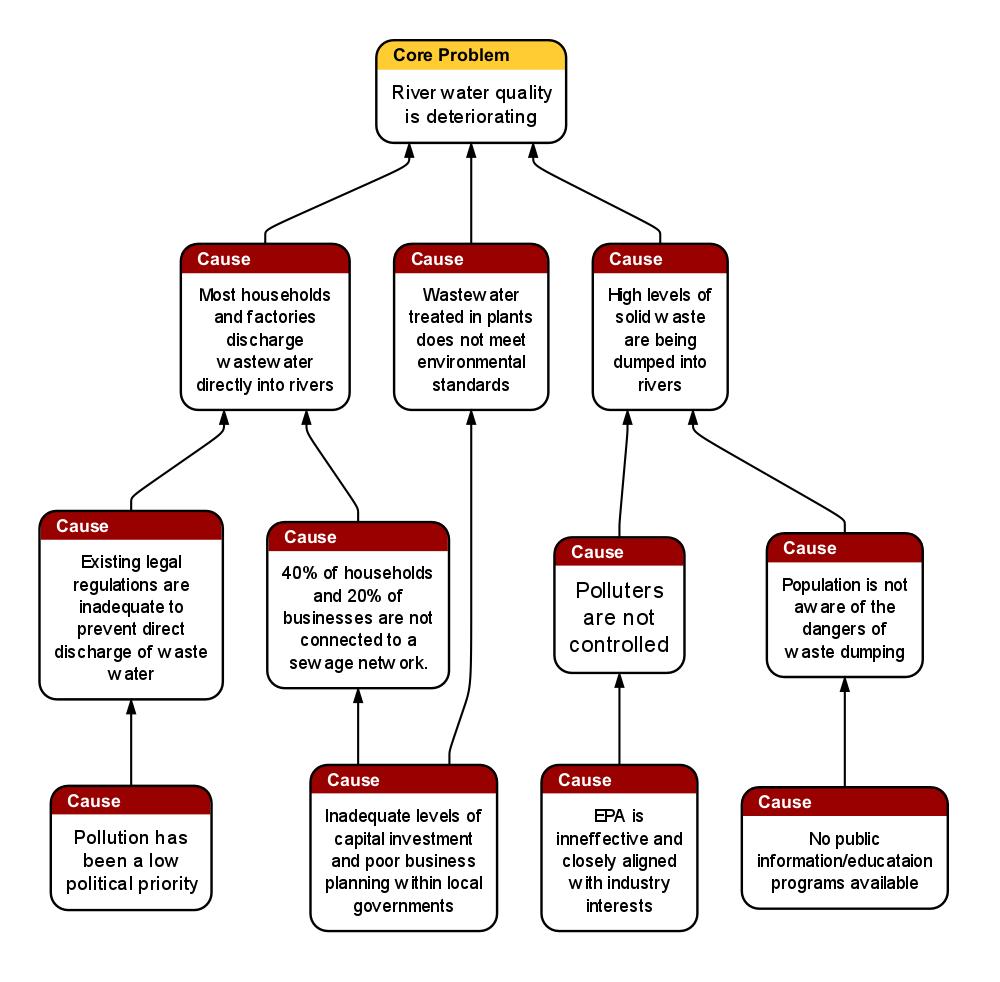
One thing to note in our example is that one of the secondary causes from our second layer is also applicable as a third-layer cause. To represent these, simply drag an edge from an existing cause to another cause that it’s applicable to.
Step 3: Add Effects
After adding the causes of the problem, we move on to adding the effects of the problem. Research and brainstorming can be helpful in determining these as well. A great question to ask here is “What’s happening because of problem?”
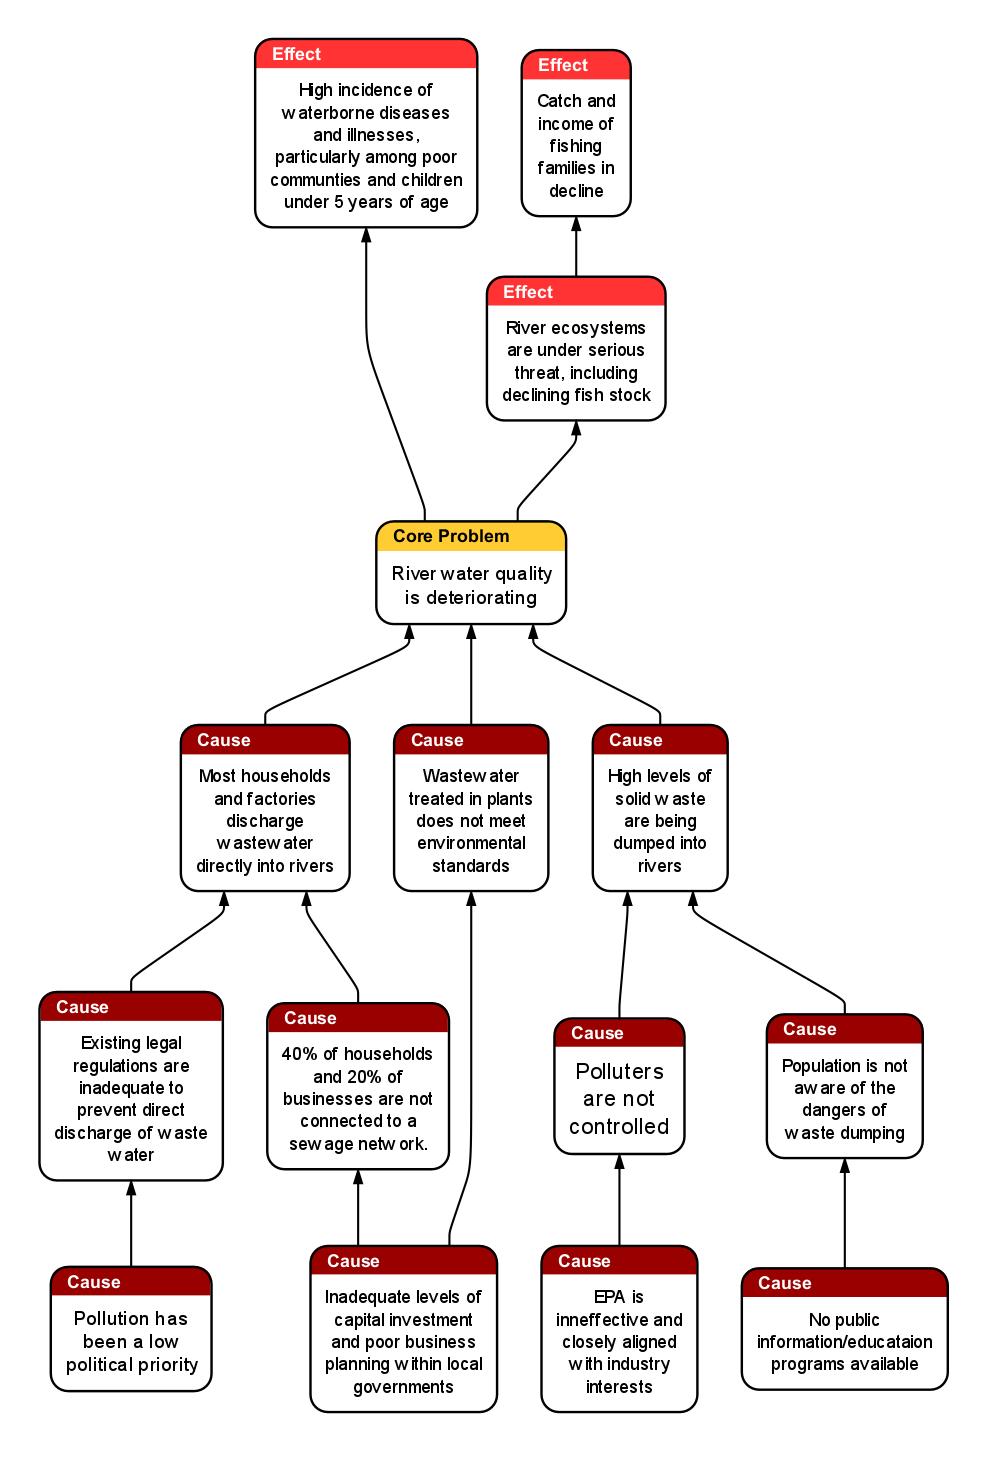
In our example, river water’s worsening quality is causing a high incidence of waterborne diseases, as well as threatening river ecosystems:
Causes have “secondary causes” that precede them. Effects also have secondary effects, however these come after the effects we’ve already listed, as successors instead of predecessors to the primary effects.
Step 4: Analyze
There are multiple ways to analyze a core problem tree, as well as options on how to approach solving its problem. You can either solve the underlying causes, which in turn will solve your problem, or you can focus on how to lessen the effects of the problem.
Focusing on the effects doesn’t completely solve the problem, and may lead to the problem arising again in the future. This method is useful when you don’t have the means to completely solve the problem, but need to lessen the effects in the immediate term, hopefully so you can solve the problem more effectively in the future.
If you’re planning on addressing the problem’s underlying causes, an objective tree is the way to go. Creating an objective tree is one of the best ways to further analyze your tree, as it re-frames the problem and allows for brainstorming on solutions to specific elements of an issue. It’s also helpful in looking forward at how possible solutions can affect different people. Focus on the very root causes of the problems, and a domino-effect of solved problems will follow.
What’s Next?
Wanting to do more with Flying Logic? Check out these articles next:
How to Create an Objective Tree with Flying Logic